Download Sketch plugin
Start Sketch Plugin

Register and Log In
To use the plugin, you'll need to log in with your Mockplus account. If you don't have an account yet, register here.
Please note:
When using Mockplus, you only need to register one account. This account can be used on all Mockplus tools and plugins.
Choose Team and Project
The next step is to choose the team and project you want to import your designs into:
Create Projects
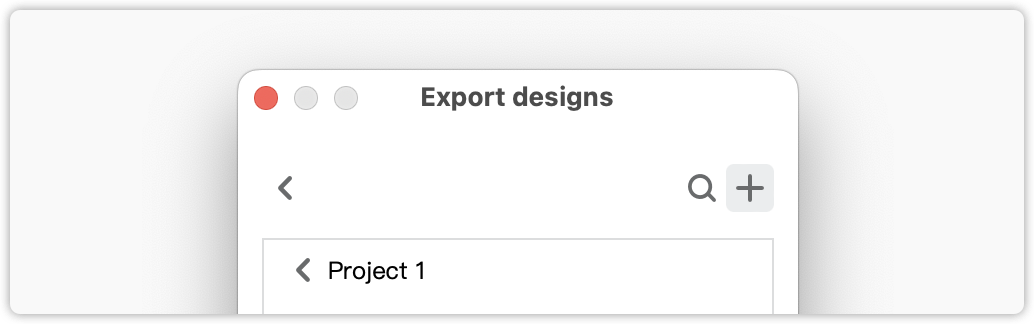
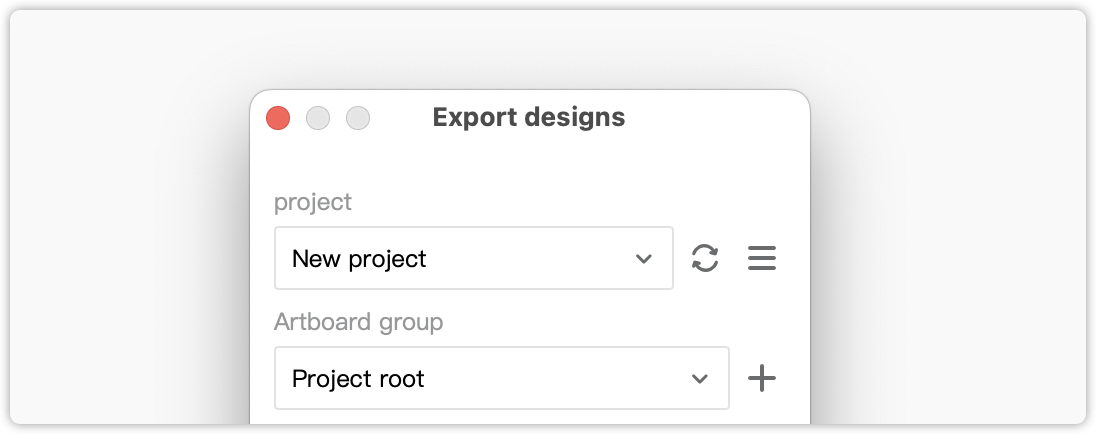
To import designs from Sketch, you'll need to first create a project inside the plugin or Mockplus. Inside the plugin, click the triangle icon next to the name of the project and click "+" in the dropdown menu to create a project.
When you have a project created, you can then specify a target page group to import designs you need.

You can also switch teams, switch accounts, and change more settings, by clicking the “More” icon in the top right corner.
Mark Assets for Export
With our Sketch plugin, you can also mark components and assets for export.
Select the layers and folders you want to export as assets and click “Make exportable”, then your chosen components and assets will be uploaded to Mockplus along with your designs.
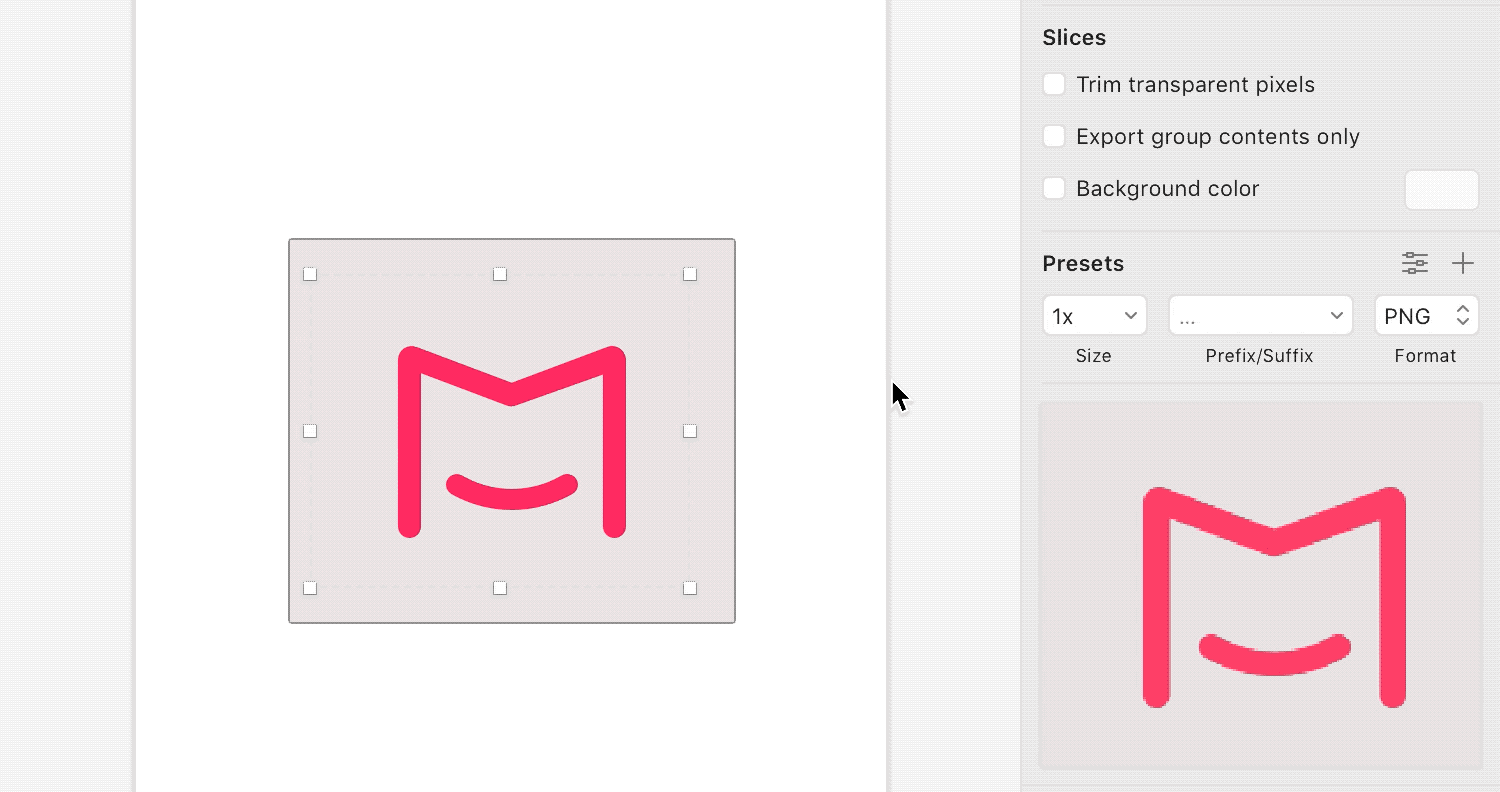
Customize Asset Size
To export assets with a custom size, you need to:
Select the layers and folders that you want to export as assets, and click “Make exportable” at the bottom right corner of the Sketch app.

Click the "Slice" tool and adjust the frame of the slice to your desired size. (Keyboard shortcut "S")
Export Assets with Transparent Backgrounds
If you need to export assets with transparent backgrounds, you can:
Group the slice and asset, and select the asset layer.

Tick “Export group contents only” in the Property panel on the right side.
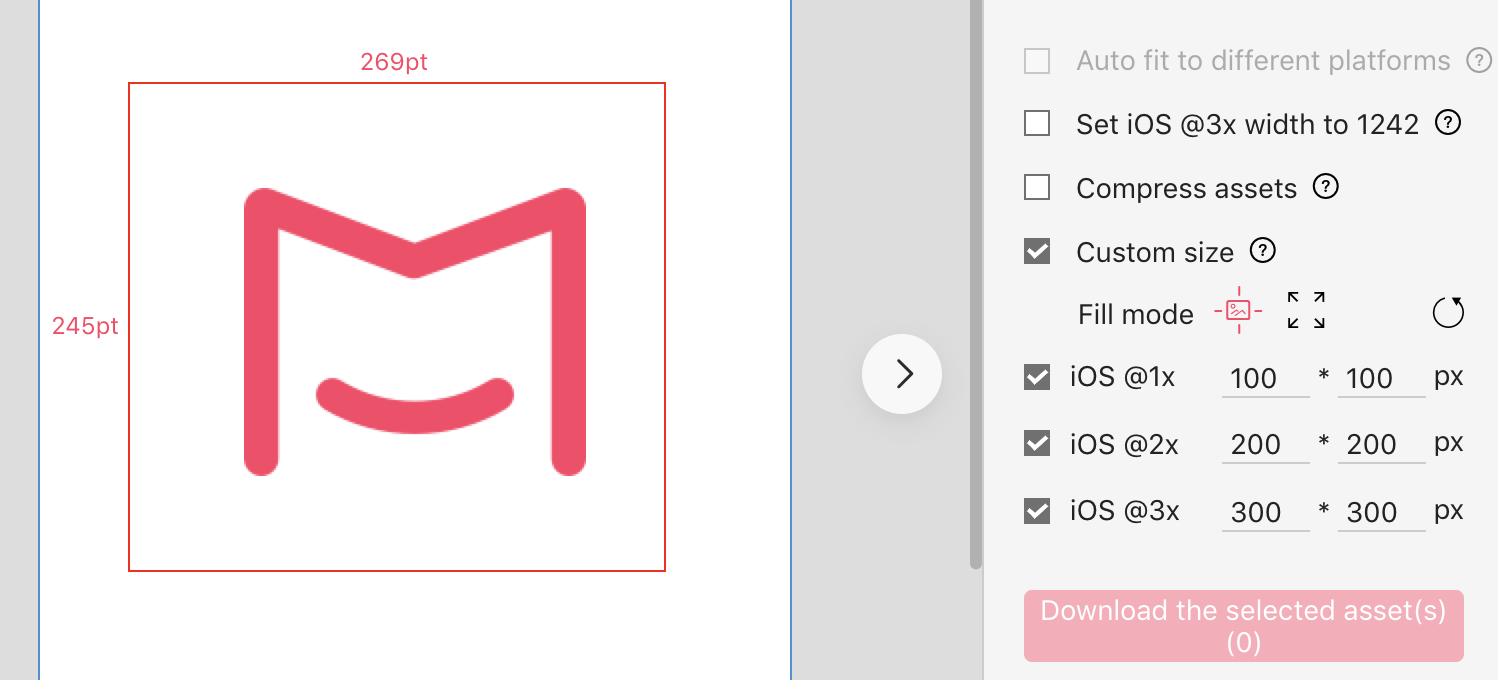
Customize Asset Size Online
If you forget to customize the asset size in Sketch or set the asset size incorrectly, after uploading your designs to Mockplus Cloud, you can still change the asset size as follows:
Select an asset in the Development mode, tick “Custom size” and click the “Center” fill mode.
Specify a value for its Width and Height and download it.
Now, you have got an asset at a custom size, along with a transparent background.
Please note:
When you specified a much larger size for the asset, paddings will be auto added around the asset.
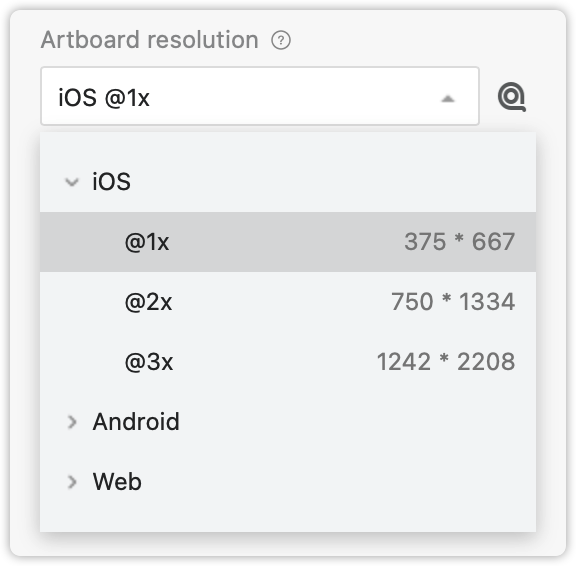
Set Pixel Density
Before exporting designs to Mockplus Cloud, you can select a pixel density, such as @1x, @2x or @3x, according to your needs.
For instance, if you have a design at 750x1334 pixels, select @2x. Well, if you have a design at 375 x 667 pixels, select @1x instead.
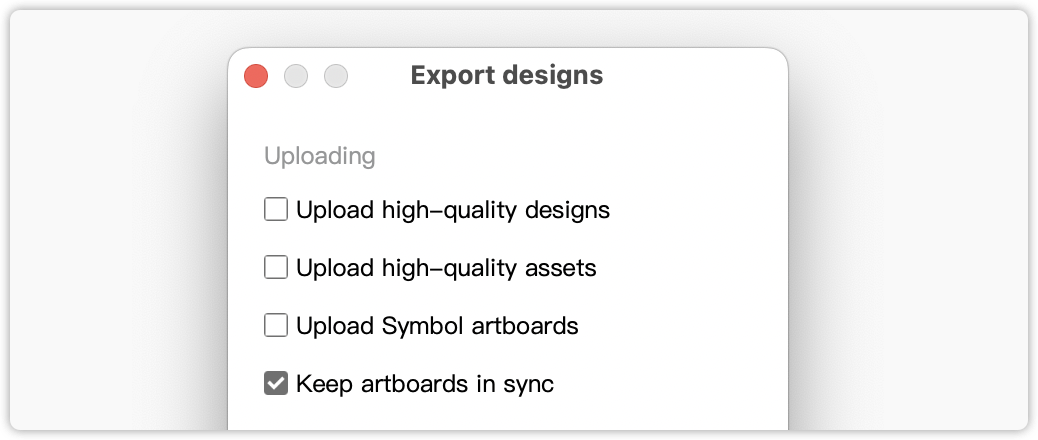
Upload Designs
Before uploading your designs, another three options are available:
Upload all pages - upload all pages and artboards to Mockplus.
Upload all artboards - upload all the artboards on the current page to Mockplus.
Upload selected artboard(s) - upload the selected artboards to Mockplus.
Choose one of these options and click “Upload” to upload all of your assets and designs to Mockplus.
Now your assets and designs will be in Mockplus. Your team members can log in and freely view design details and download assets instantly.
Please note:
You can cancel the upload at any time by pressing the “x” button.
Page States
If you have previously uploaded your design, after clicking Upload the selected artboard(s) > Upload, the plugin will upload it as a page state by default.
Check out our Page State tutorial to read more details.
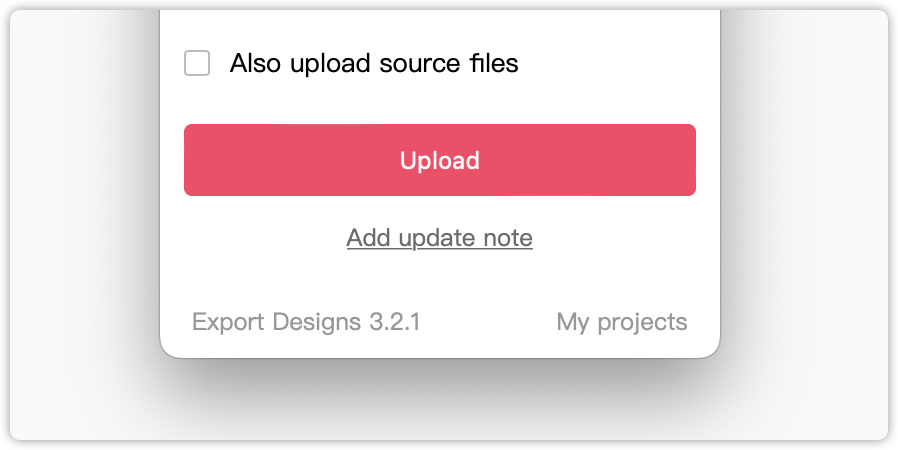
Add An Update Note
When uploading with Sketch plugin, you can also add an update note to further explain any changes. Click "Add an update note" (at the bottom of the plugin interface), both of your design drafts and update notes will be exported to Mockplus Cloud.
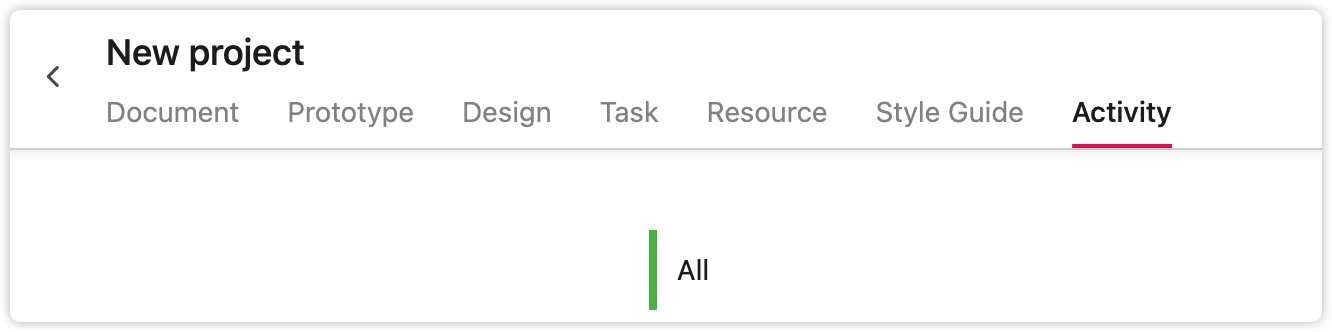
Your team members can instantly check these update note details in the "Activity" mode online.
Sync Designs
If you deleted an artboard in Sketch that was previously uploaded to Mockplus, the next time you sync your artboards with Mockplus, your project will automatically be updated, and any deleted artboards will have been removed, when you click “Synchronize designs automatically while uploading all artboards” in Settings.
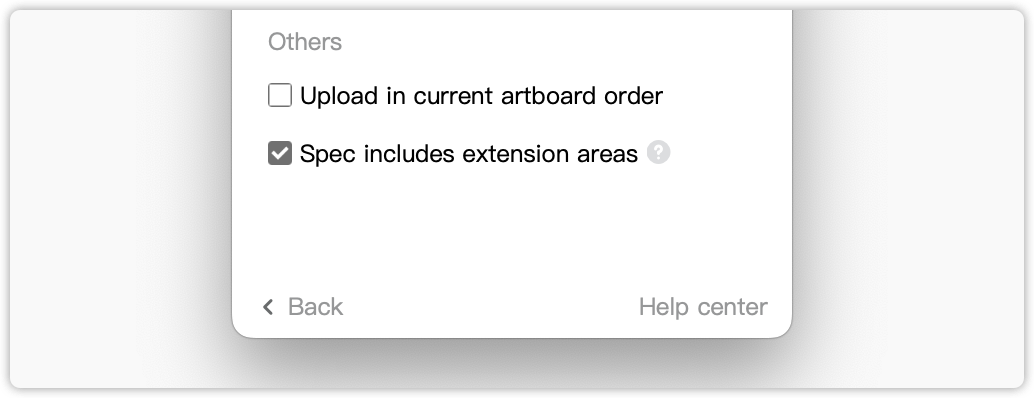
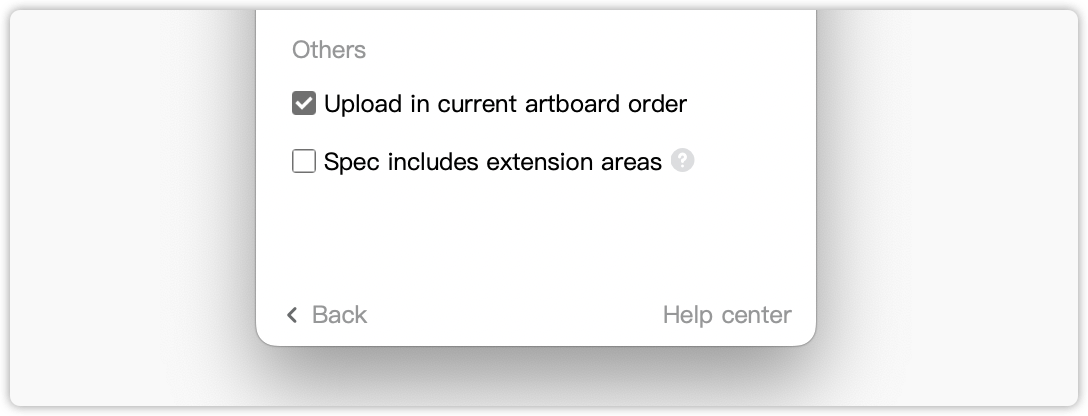
Spec Includes Extension Areas
If you select “Spec includes extension area”, your marked assets will include all extension areas such as shadows, borders and blurs. If you don’t select this option your marked assets will be uploaded without the extension area - all assets will be shown in their original layer size.
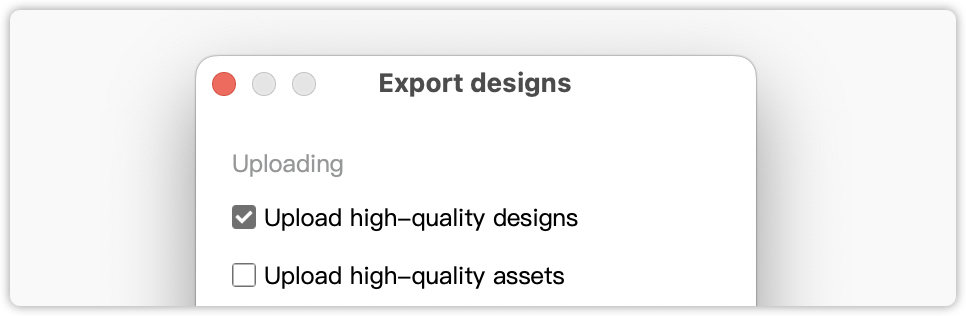
Export High-Quality Artboards
To export high-quality designs, select the option: "Upload high-quality artboards". Once selected, you can export your artboards at twice the original size.
However, this may impact the performance of your Storyboard, such as slowing your page loading. If you do encounter these issues, unselect the option.
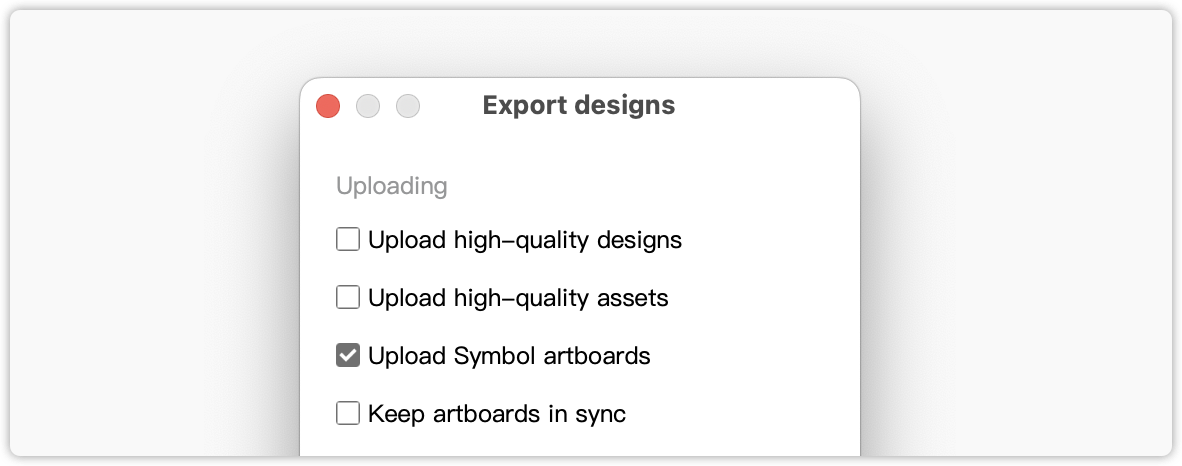
Export Symbol Artboards
To export Symbol artboards directly into Mockplus Cloud, select the "Upload Symbol artboard(s)" option in the Settings panel. Then return to the plugin homepage to import all the Symbol artboards.
Set Artboard Order Before Uploading
To ensure your artboards are uploaded to Mockplus in your preferred order, you should set the artboard order before you upload.
In the plugin’s Settings panel, there is the option to “Upload in current artboard order”, if checked, your artboards uploaded in batch will follow the same order they have in Photoshop.
Identify File Name When Uploading
In the Settings panel, you can find another option: "Identify file name when uploading". Once ticked, the artboards inside will be uploaded as new ones when you changed the file's name, even when no changes have been made.

Always Cover Existing State
To keep your designs up to date, you can check “Always cover existing state” in Settings if you want to simply upload a new version of an older, already uploaded artboard. Once the new artboard has been uploaded, it will overwrite the older version.
There will be no any reminder popping out to ask you whether to cover the older version or not.

Design System Checker
How to get started?
- Go to Sketch once you get our plugin installed;
- Click Plugins in the top toolbar and select Mockplus -> Design System Checker;
- Then log in to get your work started.

How does the Design System Checker work?
Here are the steps to make the Design System Checker work for you:Step 1. Select a design system
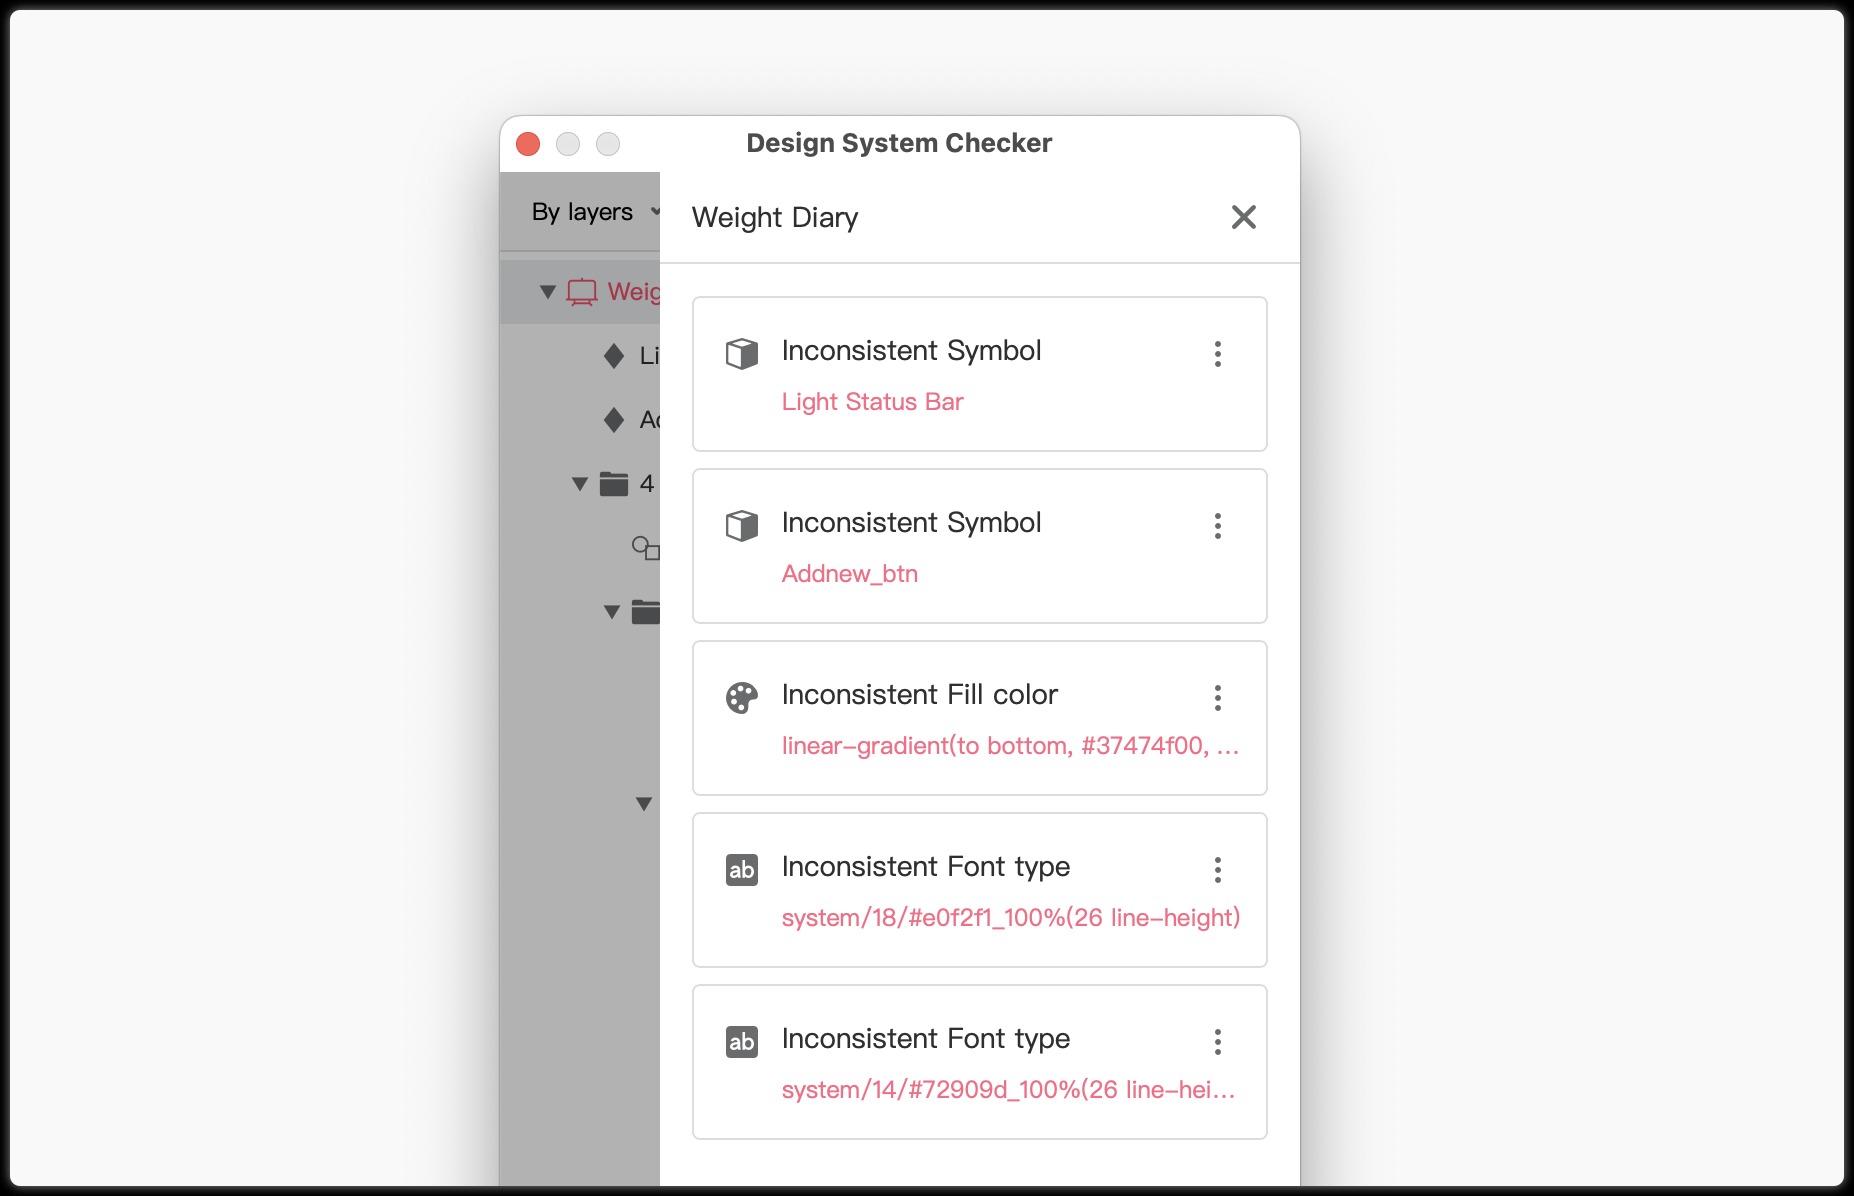
Once a design system is selected, the Design System Checker will check all the colors, texts, layer styles, and Symbols within the current design file and mark the inconsistent ones.Note. The Design System Checker will only check the first artboard if two or more artboards are selected.
Step 2. View the results
Those inconsistent ones will be shown by layers or categories after your design file has been checked. You can click in the upper left corner to choose how you would like to view the results: By layers or By categories.By layers: Those inconsistent ones will be shown in design layers.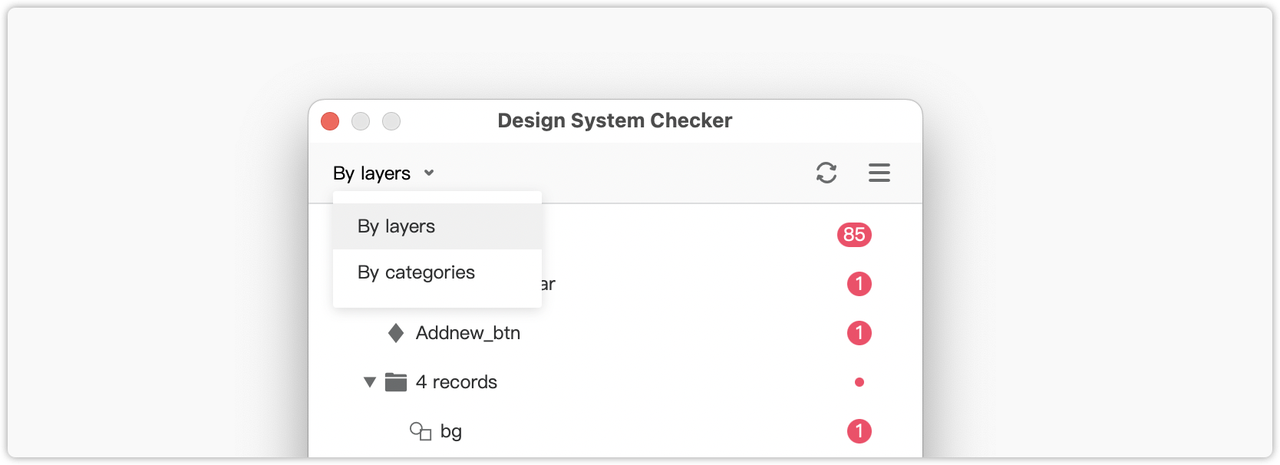
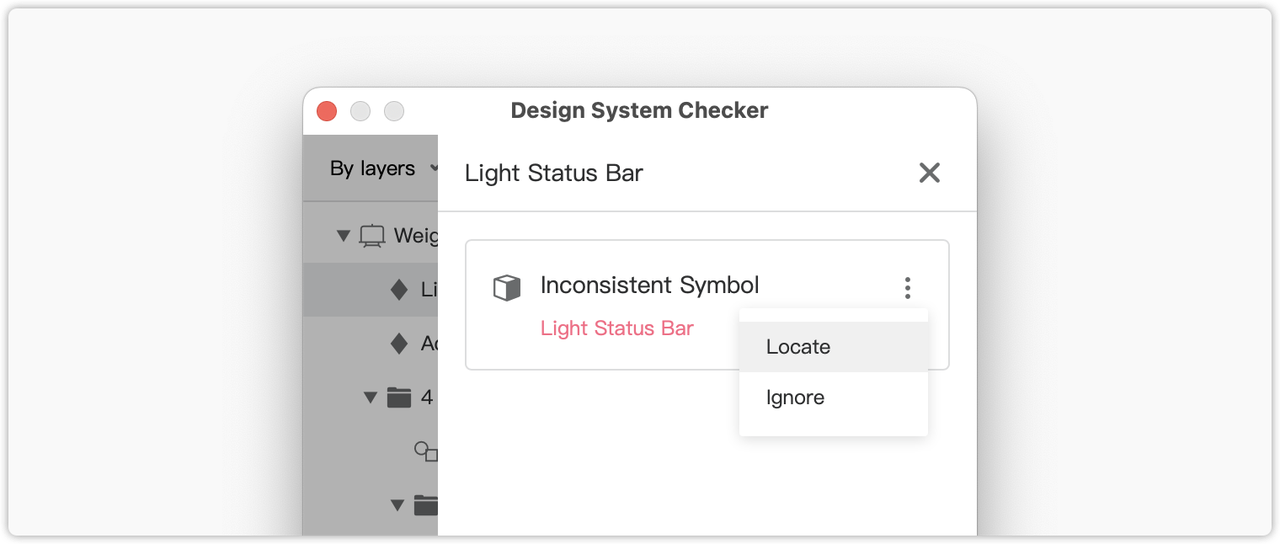
Step 3. Check the details
- Click the breadcrumb in the right corner of any inconsistent result;
- Choose Locate in the drop-down list to specify the inconsistent layer in Sketch and get it changed, or you can click Ignore, then this inconsistent property will not be checked next time.
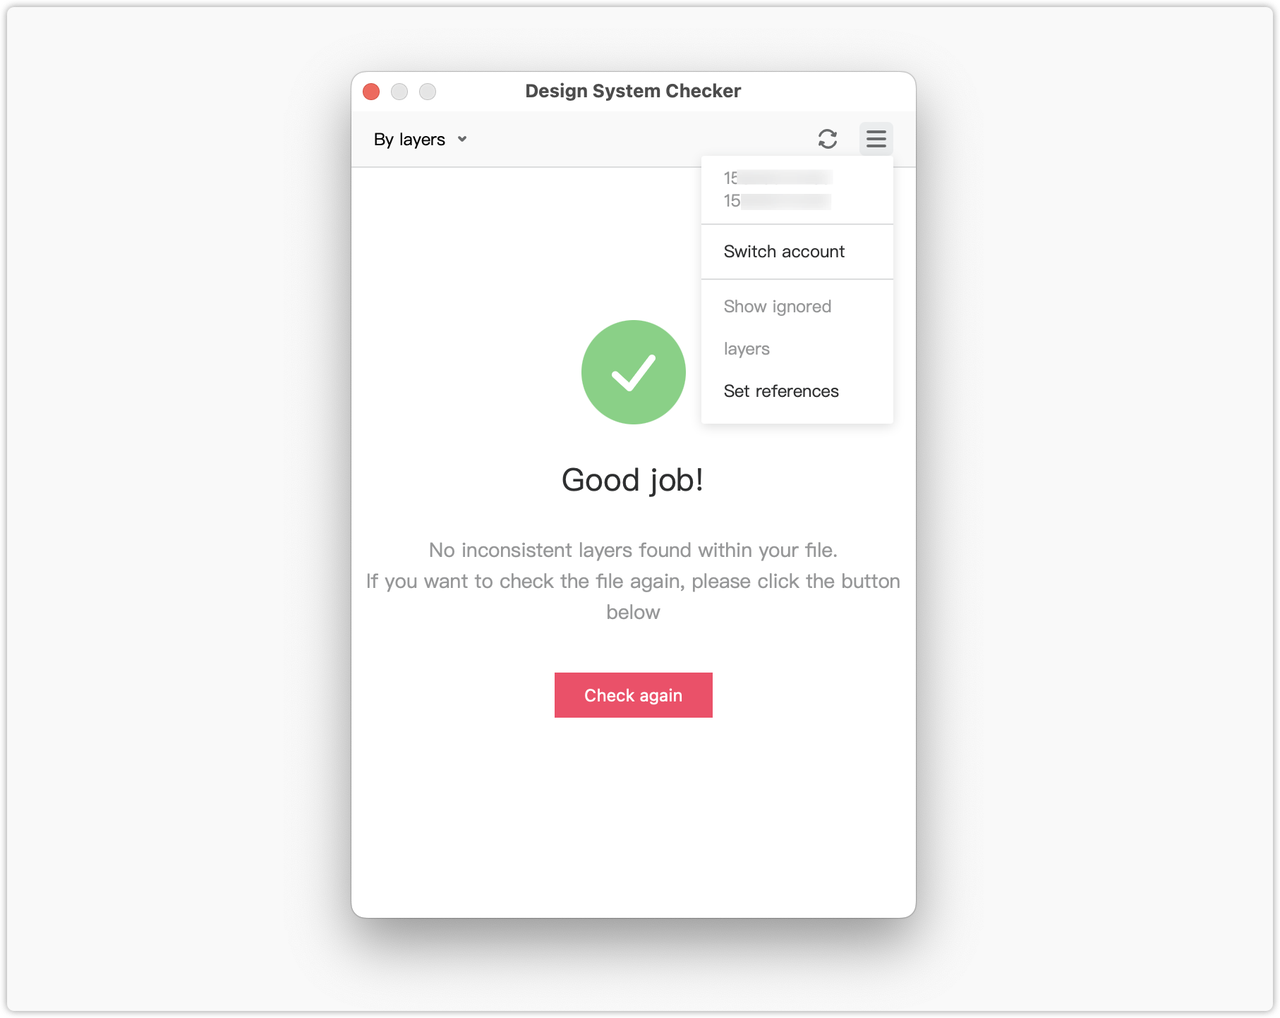
Step 4. Get more out of it
If your design content is perfectly consistent with the selected design system after being checked, it will show Good job!If you want to check your design file again, just click the Check again button.To view the ignored layers or set a design system as a reference, please click the breadcrumb in the upper right corner.